Procreate Vine Brush Pack: Elevate Your Digital Art with Graceful Details
Adding organic, flowing elements to digital illustrations can often feel like trying to capture smoke with a net. The difference between a stiff, computer-generated line and a living, breathing vine lies in the texture, pressure sensitivity, and natural irregularity of the stroke. This is where the Procreate Vine Brush Pack becomes an essential tool for artists looking to infuse their work with life. Whether you are designing wedding invitations, crafting thank-you cards, or creating whimsical stationery, this set of 10 brushes offers a curated collection of vine-inspired designs that transform flat compositions into layered, elegant masterpieces.
Why Artists Seek Organic Flow in Digital Design
Digital art has long struggled with the "perfect" look. While precision is valuable, excessive symmetry and uniformity can make artwork feel sterile. The human eye is drawn to imperfection; we recognize nature because it is rarely straight or identical. The Procreate Vine Brush Pack addresses this by mimicking the chaotic yet harmonious growth patterns found in real flora. These brushes are not just static images stamped onto a canvas; they are dynamic tools that react to your stylus pressure, tilt, and speed.
For professionals in the wedding and stationery industry, the ability to create custom botanical accents without spending hours hand-drawing every leaf is a game-changer. It allows for rapid prototyping of designs while maintaining a high level of artistic integrity. However, simply downloading a brush pack does not guarantee success. Many users encounter frustration when their results look amateurish or inconsistent, often due to how the tools are applied rather than the quality of the brushes themselves.
Common Pitfalls When Using Botanical Brushes
One of the most frequent mistakes creators make is treating these brushes as simple stamps. When you download a Procreate Vine Brush Pack, there is a temptation to drag the brush across the canvas in a single, continuous motion to create a long stem. While this works for some textured lines, vine brushes often rely on specific grain settings and scatter properties that break down under heavy, unbroken strokes. The result is often a muddy, indistinct line that lacks the delicate definition required for elegant stationery.
Another overlooked detail is the misuse of opacity and flow. Beginners often set their brush opacity to 100% immediately, leading to harsh, black outlines that dominate the composition. Real vines have varying thicknesses and translucency depending on their age and position in the light. Ignoring the subtle gradations available in the brush engine leads to artwork that looks flat and two-dimensional. Furthermore, many users fail to adjust the size jitter or rotation settings, resulting in leaves that all face the same direction, breaking the illusion of natural growth.
There is also a misunderstanding regarding file compatibility. Not all brush packs are created equal. Some third-party vendors offer "vine brushes" that are actually just PNG images converted into basic brushes, lacking the advanced dynamics needed for true illustration. If you are purchasing a pack, ensure it includes adjustable settings for spacing, wetness, and scattering. Without these controls, you are limited to rigid shapes that cannot be manipulated to fit the unique contours of your design.
How Poor Technique Impacts Professional Results
The consequences of using these tools incorrectly extend beyond mere aesthetics. In the context of commercial work, such as wedding invitations or branded stationery, the quality of the line work directly communicates the value of the product. A design featuring muddy, over-saturated vines suggests a lack of attention to detail, which can undermine the perceived professionalism of the creator. Clients paying for bespoke designs expect a finish that feels hand-crafted, not mass-produced.
Efficiency is another casualty of poor technique. When a user struggles to get a clean line because they haven't mastered the brush's pressure curve, they waste time erasing and redrawing. This slows down the workflow significantly, turning a quick accent into a tedious process. For freelancers and small business owners operating on tight deadlines, this loss of efficiency can impact profitability and client satisfaction. Moreover, if the final output requires extensive manual cleanup in Photoshop or Illustrator to fix the inconsistencies of the Procreate layer, the initial promise of a streamlined digital workflow is lost.
Practical Strategies for Better Outcomes
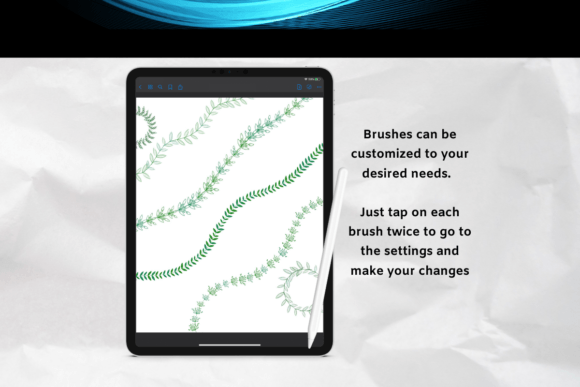
To avoid these pitfalls, start by understanding the mechanics of the Procreate Vine Brush Pack. Before applying the brush to your main canvas, open the brush studio and examine the settings. Look for the "Shape," "Stroke," and "Rendering" tabs. Adjusting the "Spacing" setting is crucial; increasing it slightly can help create a more broken, natural texture, while decreasing it creates a smoother line. Experiment with the "Rotation" settings to allow the vine leaves to orient themselves naturally along the path of your stroke.
A better approach to drawing vines is to use short, overlapping strokes rather than one long sweep. Mimic the way a real plant grows—segment by segment. This technique gives you greater control over the curvature and thickness of the stem. By building the vine in sections, you can vary the opacity and size dynamically, creating depth and dimension. Use a lighter touch for newer growth and a heavier, darker stroke for older, woody stems.
Color management is equally important. Instead of relying solely on black or dark green, sample colors from your existing palette. Vines in nature are rarely a single shade; they contain hints of brown, yellow, and lighter greens. Use the brush at low opacity (around 15-30%) to lay down a base layer, then build up the shadows and highlights with higher opacity strokes. This layering technique adds volume and realism that a single solid color cannot achieve.
Evaluating the Pack Before You Commit
Before deciding to purchase or download a specific version of the Procreate Vine Brush Pack, take the time to evaluate its versatility. Check if the pack includes variations for different types of foliage—such as ivy, grapevines, or wild creepers. A good pack should offer a range of textures, from smooth, waxy leaves to rough, serrated edges. Additionally, verify that the brushes are compatible with your current version of Procreate. Older brush formats may not support the latest rendering engines, limiting their functionality.
Look for reviews or previews that show the brushes in action, not just static screenshots. Dynamic demonstrations reveal how the brush reacts to speed and pressure, giving you a realistic expectation of the workflow. If possible, test a free sample if the creator offers one. This allows you to see if the brush behavior aligns with your personal style before investing money. Remember, the goal is to find a tool that enhances your creativity, not one that forces you to adapt to its limitations.
Ultimately, the Procreate Vine Brush Pack is a powerful resource for adding elegance and organic flair to your digital projects. By avoiding common mistakes like over-stamping, ignoring opacity settings, and failing to adjust brush dynamics, you can unlock the full potential of these tools. With practice and a mindful approach to application, you will be able to create sophisticated, nature-inspired accents that elevate your stationery, invitations, and illustrations to a professional standard.